Creating a 3D model was a key step in developing our bracelet design. It allowed us to explore form, refine proportions, and lay the groundwork for the final prototype. In this post, we’ll take you through the process of turning our initial concept into a realistic digital representation.
3D Modeling and Prototyping
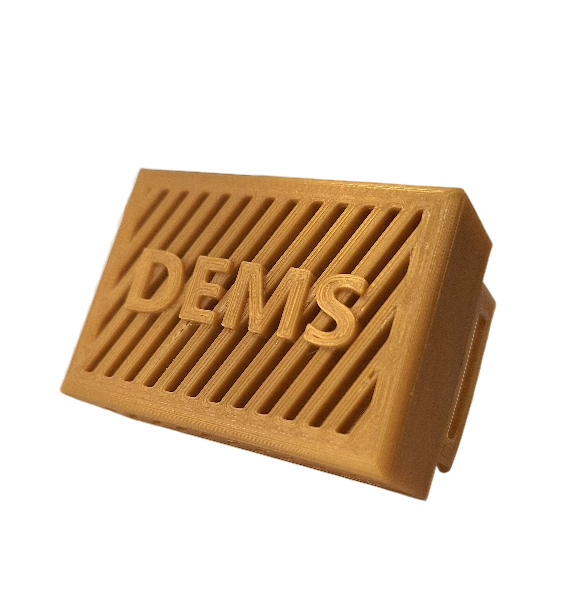
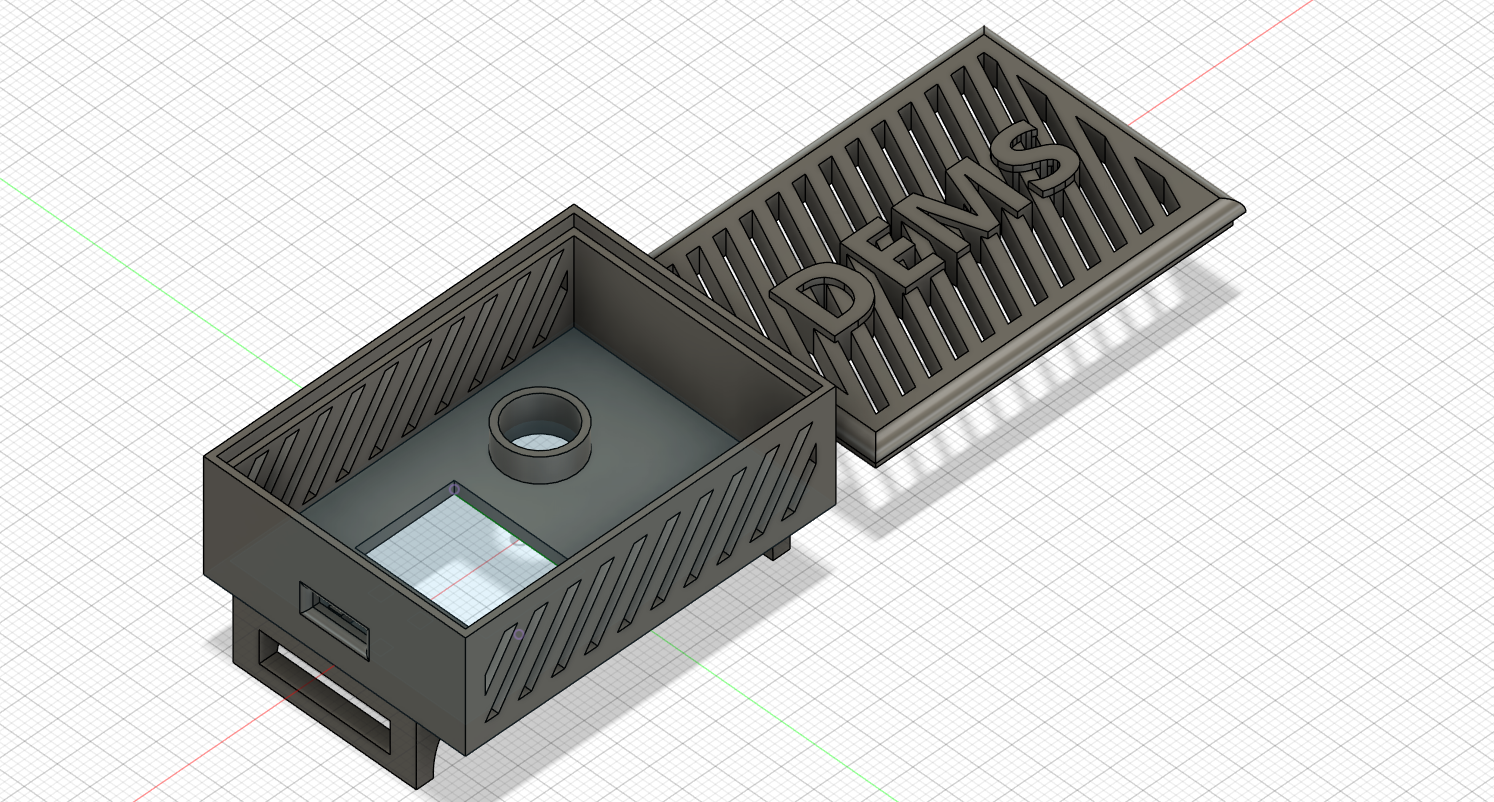
As part of the design phase, we created a 3D model of the bracelet to explore the form, proportions, and functional details of the final product. This process was essential for visualizing the concept with greater accuracy and preparing it for prototyping.
The model served not only as a visual reference, but also as the technical foundation for producing the first prototype. The entire modeling process was done with a focus on precision and adaptability.
- Iterative design: We went through several refinement stages, adjusting dimensions and design elements to ensure ergonomic comfort and functional reliability.
- Component detailing: The model included key physical features such as clasp mechanisms, band curvature, and sensor housing, allowing for full compatibility with future integration steps.
- Digital-to-physical transition: The final model was exported and prepared for 3D printing using Ultimaker Cura for slicing, ensuring optimal print settings and material compatibility.
- Prototyping: The sliced model was printed using Prusa 3D printers, enabling us to validate the physical form and test key aspects of the design.
The modeling was executed in Fusion 360, a parametric design software that allowed us to maintain dimensional control and version history throughout the process.